Monday, September 27, 2010

I heart polka dots

You may have noticed that I now have a Wishlist column on the left hand side. If I could have all the nail polish in the world, I would. But since I am poor and trying to be realistic, I've only noted the ones that I desperately want. It is still a rather long list.

Now onto a much brighter note. I painted my nails today hooray! I know that I haven't blogged in a while, busy with school (just an excuse for being lazy, actually) and everything else that's happening in my life. Mind you, they're not all that terrific.

Today I used OPI Mod About You. It is a pale pink that has a hint of lilac in some angles. I absolutely adore this colour. But the application was a nightmare. It was gloggy and thick and streaky. In fact, I think it grew more troublesome as it got to the bottom. I'm halfway through the bottle already although I've only used it no more than 8 times (unless I've been sleep walking). I can explain why. Because application is such a nightmare, I need to use at least 5 coats to achieve a perfectly smooth finish without any streaks. You cannot get a more opaque polish than this. If you over look the fact that this polish is the ultimate devil child (even more evil than OPI Alpine Snow Matte), this is a wonderfully girly colour even though it makes my fingers look darker than usual.
5 coats of OPI Mod About You
This photo is true to colour because I had to add a 25% Magenta filter because once again, my camera refuses to capture the actual colour. I really need a DSLR. These point and shoot cameras are absolutely ridiculous.

Since my parents are out shopping somewhere for the new house, I had more time to kill. So I decided to polka dot my nails. I love polka dots. Although I am hating the fact that they are the current 'in' thing and just about every store has something that's polka dotted, no matter no ugly it may look. The colour of the rest of these photos are not true to life.
I used a dotting/marbling tool to make the polka dots in Revlon Black Lingerie. The scalloped tips are drawn free-hand, same as the hearts. But then for my right hand, I thought: "Why not make a template?" That was my stroke of genius. Since I could use masking tapes for striping guides and reinforcement stickers as tip guides, why not make pattern templates too.
I folded the masking tape in half and cut the shape of a semi-heart then unfolded the tape. Like with any other guides, I had to press down firmly to prevent bleeding. I'd have to say that it was a success (surprisingly as most of my creations don't turn out the way I imagined them to be).
The left thumb is my free-handed heart while the right is the heart from the masking tape template. It is actually quite funny because they look identifical even though I had no idea what I was cutting. I guess it's fate! Bet you couldn't tell the difference anyway. But if I had free-handed the right hand, the hearts wouldn't look like hearts. I can't control my left hand.

Maybe I should try cutting a masking tape guide next time in the shape of a cat. Til then, toodles (or was it doodles, don't remember).

Saturday, September 25, 2010

Inactivity

Once again, I have nothing to blog about. I still haven't changed my nails. I really don't feel motivated to paint my nails. I feel like I haven't done anything today and it is nearly 8 o'clock. Life goes by so fast now.

I've just graduated from high school yesterday (then celebrated Nickey's birthday, happy birthday, again) and I feel so empty. To be honest, it is not my friends who I am going to miss because I know that I'll still be seeing them long after the HSC. I really miss my beloved teachers. The teachers who have put up with me for the past 2 (if not more) years. They were the ones who had to suffer my constant complaining and answer the stupid questions that I ask. I feel like I owe them so much. I honestly don't know how I could ever thank them enough.

I don't want to leave you staring at a sad blog entry about my life. So instead, you get to see Nelly's late birthday present (the small nail polishes) and what we used to make it (everything else in the photo). Just ignore the cling wrap and packet of strawberry clouds in the background.
I probably won't be posting much for the next 2 months. HSC is killing my life.

Wednesday, September 22, 2010

Ruffian moon manicure tutorial

I've noticed that there is a current trend in "Ruffian Moon" manicures. Creative Nail Design, otherwise known as CND is leading this trend with several variations of this manicure style. I was inspired by these 2 examples:
I do not own this image. Credit to source.
I do not own this image. Credits to source.
So I've decided to create a simple tutorial for creating this stylish look.

If you remember my Channelling Chanel entry, I talked about using french tip guides that can be purchased on Ebay for next to nothing. Well, great news! I've found an even cheaper method that eliminates the shipping time: hole punch reinforcement stickers! They can be found in all news agencies in the stationery section. Now gather them and cut them in half so one ring can be used twice.
Paint your nails a base colour. I wasn't bothered to make the whole thing perfect becase only the bottom of the nails will be seen. I've used 4 coats of Essie Pound Cake at the bottom. It is a light nude that leans towards greige and has a slight pink tinge. I would definitely paint my walls this colour. Looks so refreshing.
As you can see, the tips are not properly painted. This did not affect layering in any way. Apply a quick dry topcoat or wait for as least an hour for the polish to dry properly so that sticking wouldn't ruin the base. Get your semi-ring. Stick it on the palm of your hand to remove the excess stickiness. Stick it onto the bottom of your nail and make sure the semi-ring is stuck firmly to your nail otherwise bleeding will ruin everything.
I applied OPI Dim Sim Plum to the top half of my nail. I got a perfect coverage with 2 coats. I then applied China Glaze Matte Magic Topcoat for an extra twist.
Remove the semi-ring when the top half is almost dried. Check out the final result.
I'm pretty happy with it seeing that this manicure was so quick, easy and cheap to do. Those reinforcement rings would also be perfect manicure guides. Maybe some glitters would spice things up a little more. Go nuts!

Tuesday, September 21, 2010

I need a life

I have nothing to blog about today. I took my nail polish off without taking photos of it. So I am left with bare nails, once again, and no record of my beautifully frankened baby that looks a lot of OPI Meet Me On the Star Ferry.

Since I have nothing new to say, I'll just share with you my Textiles Major Work and explain the concept behind it. Photos first!
I bet you're looking confused. Probably disappointed at the quality. I should be quite proud of it. I am, but I just know that I could've done the details better.

I've made a reversible dress, The corset top is attached to the skirt lining while the skirt flips around to reveal the dolls that are on the inside. Too bad the skirt doesn't close properly due to my crappy measuring skills. I feel rather lazy tonight. So here's a paragraph that I've copied and pasted from my Textiles Design Inspiration's justification part.

"My inspiration comes from my surroundings: the human environment. From an early age, we are taught of the necessity of wealth through the much-loved Monopoly. Communication is made faster through technological advances yet it doesn’t appear any simpler. Love is elevated to a cult-like status. Fast food is no longer only for convenience as people became caught up in the modern pace of fast city living. Our desire for knowledge intensifies as it becomes a measurement of a person’s intelligence. Emphasised by the media, I feel these issues play a vital role in shaping the perspectives of an individual. Personally, these factors are overwhelmingly powerful in affecting my decision making as my life revolves around these central themes. Wealth, communication, love, fast food and knowledge are essential in the modern way of life and are capable of causing great debates and emotional turmoils. Through textiles arts, I am able to identify these factors as integral to not only my own personal developments but also the whole of society."

Yes you totally read all that. I know you didn't. So you're forgiven. I'll blog about something a lot more interesting tomorrow. I just might to a raindow mani inspired by Troll's "unicorns".

Monday, September 20, 2010

5 minutes nail polish removal tutorial

Disclaimer: I am definitely recommending this method. I do not claim this as my own. I learnt it from Deborah Lippmann so I'll recognise her as the original source. However, the true origin of this amazing 5 minutes method is yet to be discovered.


Nail polishes are terrific when you don't need to remove them. It used to take me up to 30 minutes swiping the nail polish off using millions of cotton buds. It was both a waste of time and precious cotton buds that are needed for other great things like making sure my ears are squeaky clean. Too much info?

One bright and sunny day, I was browsing through my favourite nail blog (because I have no life), I came across a Youtube clip of Deborah Lippmann showing her quick and easy way of removing nail polish. That lady is a genius. I tried it at once and it worked so well. I've been using this method for a couple of months now and it has been unbeatable! Except with large chunky glitter like China Glaze Doll's House but maybe it was my fault since I applied 5 coats of the stuff. I've been introducing this amazing method to my friends and they all love it (the ones who tried). So here's a tutorial if you don't yet use this method.

Step one. Gather your equipment. You'd obviously need nail polish remover, I like mine acetone-free. It is purely psychological because as long as you're not consuming acetone, it won't do much harm. You nail polish is actually killing you more than your remover. Now that you've gotten your remover, get some cotton balls. They have to be BALLS. Not buds, not tissues, BALLS. Go out and buy a packet if you don't have any. They are so cheap and will last you forever. I only need 1 ball to remove both of my hands.
Now grab your ball. They're so fluffy. Unravel it into a strip.
It should come apart easily as the ball itself is produced by ravelling a strip like a snail shell.
Split your strip down the middle vertically into 2 strips. I am saving you money!
You can continue to split but I like mine with a little bulk. So now tear them into little pieces that are nail-sized. No need to be neat since this is all going to go into the rubbish bin anyway.
Keep tearing until you have a lot. I usually have 12-15 pieces. 10 for my nails and the others for wiping and cleaning up any bits of nail polish left behind.
Now you have the cotton pieces ready. Get your nail polish remover and pour it into the lid and fill it up like so.
Nice and smelly. Now take one of those cotton pieces (let's call it CP) and dip it into the remover. Don't dunk it in. Just dip in the edge because the remover will travel up the CP. Too much remover on the CP will dribble like crazy when you're pressing the CP onto your nail. It could travel up your hand all the way to your elbow. Happened to me before. Not a pleasant experience.
Press the wet CP onto your nail gently. It should be completely wet and cover your entire nail.
Do the same for all the other fingers. I like to do mine one hand at a time because I need the other hand to wipe the CP off.
Leave them on your nails for 1-2 minutes, give or take. That's the time where the remover is doing its job. This is similar to soaking your nails in remover but a lot less harsh on your skin. You nails will not absorb the remover. Like I said before, your nail polish would've killed your nails more than the remover. Next, grab a new piece of CP and wipe off the wet CP from your nail while pressing down with some force. Put some muscle into it! Do it from your nail bed to your nail tip. This way, your nails will not be damaged.
If you do it correctly, almost everything (if not everything) should come right off your nails.
I only have some polishes remaining on the sides because my thumb is flat, not curved like my nails, so I couldn't apply enough force to wipe the sides. Now repeat this for all the other nails.
This is with only one swipe. My index finger, middle finger and pinky are completely clean in just one swipe! This would've taken forever with cotton buds. Use your remaining CP to do the other hand and clean up any bits that maybe be left on your nails.
In the end, you'd have beautifully clean nails.
I even have a strip of CP left over. So that means I've used less than 1 cotton ball to remove all my nails.
I did time myself and found that I've completed the whole process in under 5 minutes, including the soaking time. So I don't think I'll ever return to the primitive cotton buds method ever again.

Just a few important things before I go:
♥ Never use tissue to remove nail polish. Tissue is actually quite coarse and will damage your nails.
♥ My nails used to peel even when I used cotton buds. With this method, my nails don't peel nor dry out anymore after removal.
♥ Always wipe from nail bed to nail tip. Swiping back and forth and/or in the opposite way will make your nails peel.

Now that it only takes 5 minutes for you to take off your nail polish, maybe you'd change your nails more often. Come on, I dare you.

Sunday, September 19, 2010

What happened to black?

I know what you're thinking, "How come you have so much time to paint your nails?" I don't think I'll answer. Otherwise I would sound extremely lazy.

So yesterday was Sunday. I bought Lush Lemony Flutter Cuticle Butter yesterday. When I got home, I applied it religiously. I'll continue to use it for a week then maybe I'll write a review on it. This entry is actually dedicated to showing off my well hydrated cuticles. They look splendid right now.

I used OPI Jade is the New Black from the Hong Kong Collection. I've only just gotten around to using it now. There are still so many colours that I haven't worn yet. The application was easy breezy. 2 coats was enough for a smooth and opaque finish. I've only worn this for 2 days so I can't safely say that this doesn't stain. I remember my crappy experience with China Glaze Four Leaf Clover. It stained my nails like crazy even with basecoat.

According to numerous nail polish gurus, Jade is the New Black is a 100% unique colour with no dupes or twins or siblings. I just like it for the colour. It looks like a forest in the Northern Hemisphere on a foggy day. Yes it has to be Northern Hemisphere because I'm picky like that.
2 coats of OPI Jade is the New Black
My beautifully hydrated cuticles. The colour is much more true-to-life on the close up. Can you tell that I cut my nails? I chopped off so much...

Guilty pleasures

Attention: Any hint of arrogance present in this entry automatically translates to pride and pleasure.

Now that's out of the way. I am proud of my nail polish collection. Like any proud parent, I would like to see my babies grow and expand. Hopefully I would eventually reach the 1000+ mark. Sooner than later, I hope. There are so many more colours, finishes and textures that are still waiting patiently for me to discover them. I guess this is the purpose of this blog. To help you to discover something wonderfully new, whether it be an idea, a colour, or another way to procrastinate during the vital HSC period. I do feel rather sentimental today.

I really need a nail polish stand. A place to display my nail polish for easy access. Currently, they occupy one shelf on my downstairs bookshelf because that is the only place where the sun cannot get to. Sunlight + nail polish = bad. So don't ever store your nail polish where the sun can get to it. My other nail art supplies are stored in random shoe boxes under my coffee table. I hate it. I want a cupboard didicated to nails. Space is always an issue.

I think I current have 70-ish bottles of nail polish. I remember counting but not the number. It is a pretty pathetic number, I do have to admit. But a girl only has so much money to spend. I arranged them according to brand. I like the look like matching bottles. Since I have no life, I'll name every single one for you.

OPI:
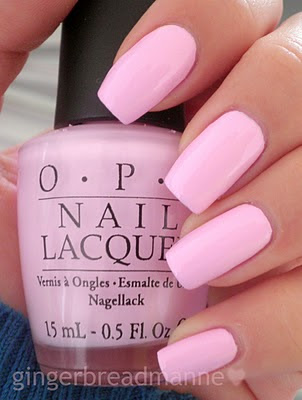
Top row from left to right: Girls Just Want to Play, Dim Sim Plum, Chapel of Love, Mod about You, Happy Anniversary, Alpine Snow (Matte), Funny Bunny, Banana Bandana, Glitzerland, Bling Dynasty, You Don't Know Jacques, My Private Jet
Bottom row from left to right: Jade is the New Black, What's with the Cattitude?, Ski Teal we Drop, Yoga-ta get this Blue, Brand New Skates, Sheer your Toys
China Glaze: Lubu Heels, Doll's House, Light as Air, Strong Adhesive Basecoat, Matte Magic Topcoat, Ghoulish Glow Topcoat, Medallion, Sun Worshipper, Four Leaf Clover
Essie: Matte About You Topcoat, Haute as Hello, Pound Cake, Playa Del Platinum, Silver Bullions, Mint Candy Apple, Mesmerize
Revlon: Quick Dry Topcoat, Black Lingerie, Primal Purple, Fuchsia Fever, Franken (used to be Cherry Crush), Franken Squeaky (used to be Grape Shimmer), Franken (used to be Copperglaze Platinum)
Zoya: Ivanka, Gilda, Savita, Get Even Basecoat
Nubar: Sour Candy, 2010 (G188), Pasadena Purple
Milani: Key Lime Shine, Blue for my Baby
Colour Club: Worth the Risque (yes I bought 2 bottles, they were on special)
OPI mini: Tattoo You Want Candy?, I Love Mummy, Witch Arm?, Glow-ink the Dark
Orly: Fantasea
Bloom Seoul, Sally Hansen Nail Hardener, Kami Nail Foil Adhesive
Here are the under $5 nail polishes that I don't feel safe using anymore because they are packed with chemical goodness. So I use them extensively on fake nails. The colours are still wonderful though.
I can't wait to take another trip to Bankstown. I really want to expand my Essie and Orly collections so they can grow to compete with OPI for my love. I would also love to get my hands on more Zoya but Ebay is currently the only 'affordable' way of getting them. They still cost on average $12 a bottle when the exchange rate is high. I'll shut up now. Thank you for reading. I'm off to make a wishlist.

Friday, September 17, 2010

hoyu Beautylabo hair dye review - honey beige

I dyed my hair on Sunday because the annoying regrowth was really getting on my nerves. Plus I wanted to try out hoyu's Beautylabo hair dye series now to ensure the colours will come out for formal. So here's a review.

As an Asian (Japanese to be precise) hair dye, the colour is intended for dark hairs. I'm not sure if there is bleach in this product but I can definitely smell the presence of ammonia. Beautylabo is produced by the same company as the well-know Beauteen but is targeted at a more mature market, or so it claims. I ordered mine in Honey Beige from Ebay.

The box is quite cute. Just a bit squished from being posted all the way from Hong Kong.
Inside the box there are: 1 colour paste-like thing that comes in a tube (labelled 1) which reminds me of those olden toothpaste tubes. 1 colour developer (if that's what it is called, labelled 2) in a bottle. You squeeze the content of the tube into the bottle. Close the lid tightly then shake vigorously for 30 times. I kind of overkilled it and shook like there was no tomorrow. Then there is the comb applicator which replaced the lid when applying the hair dye. Instructions, hair conditioner for shower and gloves come in that neat little paper wrap. It is so adorable.
Since the instructions are in Japanese, I just took a photo for its cuteness.
Try to dye your hair when it is oily. The natural oils will help the dye to stick better. So I didn't wash my hair the night before I dyed it. So on Sunday with my oily head, I mixed 1 and 2 together and screwed on the comb applicator. I put on an old shirt that I wear for painting and used an old towel to tuck in the collars. I squeezed the smelly hair dye out and massaged the dye into my roots with both my fingers and the comb. I didn't dye my ends though because I didn't want to damage them further. Leave the dye in for approximately 15 minutes give or take, depending on the thickness of your hair strand. Thick hair will need 20 minutes while thinner hair will need 10 minutes.
Do not leave the dye in for more than 20 minutes. I left mine for 20 minutes because I was paranoid that the colour wouldn't turn out. But I am really happy with the result.
Before (with flash)
Before (natural lighting)
Before side view (natural lighting)
After (with flash)
After (natural lighting)
After side view (natural lighting)
The colour is actually a lot lighter in real life. I think it is quite close to what the box depicts. So my final verdict:
Pros:
♥ Terrific for dark and black hair.
♥ It doesn't stain your skin. I was quite messy and got it all over my ears. But the dye only seem to cling onto hair, not skin.
♥ Cute packaging.
♥ One box is sufficient for med-long hair. It was just enough for me.

Cons:
♥ Smells like ammonia.
♥ Instructions are in Japanese (I had to guess).
♥ Extremely overpriced in Australia so I had to resort to Ebay.

I think in the end, I would definitely use this again because the colour has turned out so well. I've used Beauteen before and that was a success too. So a big thumbs up for hoyu! Plus no more regrowth. I love love love it!